Tuesday, 17 July 2012

Malwani Sukka Chicken (kombdi) | Malvani Dry Chicken Masala


Last wednesday husband demanded  to make  malvani chicken sukka along with bajari bhakari . I already had malvani masala sent by  my mom so prepared this spicy & jhanjhanit chicken sukka  along with bajari bhakari

A creamy chicken recipe with delicious spices and Malwani flavours. This recipe is a bit  dry & sukka & doesnt has much gravy (rassa) .
''Malvani Cuisnine originates from the Western Coast of India. Its a coconut based hot and spicy chicken curry that is served with rice based main course along with sol kadhi as appetizer


close look


INGREDIENTS

500 gm (1/2 kg) boneless chicken ( I had used drumsticks)

1 grated dry coconut

1 tsp cumin seeds

2 red chillies

1/2 cup coriander leaves

4 onions, chopped

1/2 tsp turmeric powder

1 tbsp roasted coriander seeds

2 green chillies

3 garlic pods

2 tbsp each of ginger and garlic pastes

2 tbsp malwani masala

2 tbsp oil

Salt to taste
 
Malvani masala 3 tbsp- For the Malwani Masala recipe pls click here :

Water

For Green Masala:

Coriander Leaves – 1 bunch

Mint Leaves – 1/2 bunch

Green Chillies – 6 no.


METHOD:

1.For the green masala, make a smooth paste of all the ingredients.

2.Clean the chicken but leave the skin on. Then cut the chicken into 10-12 pieces. Make slashes/cuts on the chicken pieces. To the chicken pieces, add the green masala, ginger garlic paste, salt to taste and 2 Tbspoon of malvani masala. Keep aside for about an hour.


3.In a pan roast the grated coconut and whole red chillies.

4.Grind this roasted mixture with the garlic pods, cumin seeds, roasted coriander seeds and water.

5.Now add Malwani masala and a little more water. Grind it again into a coarse masala paste.

6.Heat the oil in a pan, add ginger and garlic paste, chopped onions and cook for a while.  When the onions turn translucent, add turmeric and cook for a few minutes.


7.Add the chicken to the pan, mix it well and then add the masala paste.add very little water only if required


8 .Cook closed for 10-15 mins or till the chicken is done and well coated in the masala & chicken becomes a bit dry ( sukka ) .keep checking in between or else chicken will get burnt

9.Serve hot with bajari bhakri / kombdi wade


Friday, 13 July 2012

Eggless Banana Muffins Recipe | BANANA MUFFIN WITHOUT OVEN OR MICROWAVE / BANANA MUFFIN IN APPAM MAKER OR PANIYARAM MAKER /MINI BANANA MUFFINS / BANANA MUFFINS /BANANA MUFFIN IN albeskiver pan / NO OVEN BANANA MUFFIN /cashewnut or walnut banana muffin/banana appe

A muffin is an American English name for a type of quick bread that is baked in small portions. Many forms are somewhat like small cakes or cupcakes in shape, although they usually are not as sweet as cupcakes and generally lack frosting. They may be filled with sweet fillings, such as chocolate, toffee, lemons or blueberriesThere are many varieties and flavors of muffins made with a specific ingredient such as blueberries, chocolate chips, cucumbers, raspberry, cinnamon, pumpkin, date, nut, lemon, banana, orange, peach, strawberry, boysenberry, almond, and carrot, baked into the muffin. Muffins are often eaten for breakfast; alternatively, they may be served for tea or at other meals.

I tried this muffin in an appam maker especially for those people dont own a microwave or oven & still wanted to make muffins at home .My husbands verdict was it tasted just like readymade muffins only issue was  size so I will call them as mini banana muffins.You can still prepare this in ur kitchen & impress  your family with these addictive mini banana muffins yummies!  .Moreover  it is vegetarian since it doesnt use eggs .

Do not forget to Place a tava /griddle on gas  before placing Appe/ Appam pan/albeskiver pan otherwise your muffins will get burnt & turn black.
 A RECIPE WORTH TRYING YOUR KIDS WILL LOVE IT


Ingredients:
All purpose Flour( maida ) -  3/4 cup
Banana -  1 big sized
Oil - 1/4 cup
Granulated Sugar -  1/2 cup
Baking powder -  1/2 tsp
Baking soda -  1/2 tsp
Vanilla essence  -  1/2 tsp (optional)
Walnut /cashewnuts  -  2 tbsp finely chopped


 Method:
1.Sieve maida, baking soda and baking powder atleast twice, keep aside.


2.Peel the skin of the banana and mash them well (I grinded it in mixie  to a smooth paste).


3.Add oil, vanilla essence and mix well. Fold in sugar and mix well until sugar completely dissolves.


4.Add sieved maida , baking powder-soda mixture and mix well until a creamy mixture is formed. Add the chopped cashewnuts reserve little for topping.


5.Add 1 tsp butter into each groove & put 2-3 cashewnuts in each groove.


6.Place a tava /griddle on gas .next place the Appe/ Appam pan/albeskiver pan on top of tava.Heat the Appe/ Appam pan/albeskiver pan (chk below picture) { i did not click the photo of appe maker on top of tava)
7. Drop a bit of batter to check and if you hear the sizzling sound, the pan is ready to cook muffin .
8.Now  with help of a spoon  put batter in each groove so that ¾ of the grove is covered and then cover it with a lid.


6.Reduce the heat to low  at this time. let it cook for 5 minutes.After 5 minute or so, open the lid and chk if the muffins have got brown colour .At this point u can see the muffins raising that is increased in volume as seen in below picture.

7.If  they are not browned  cover & let it cook for another 5 minutes.Once browned with a kitchen knife, run it around the edge of the muffin to see if it is browning.Make sure the muffin  does not turn dark brown or black in color. The one in the middle is the one that gets dark fast.
8.With spoon flip  it on the other side, add oil and cook until done. Let the remaining muffin  cook correctly and turn them when done.
9•When turned on the other side, add 1 tsp oil again and reduce the heat even further and cover with lid. this will cook faster.


CLOSE LOOK

Tips:
•Do not forget to Place a tava /griddle on gas  before placing Appe/ Appam pan/albeskiver pan otherwise your muffins will get burnt & turn black.
• Adjust sugar according to the banana variety you choose.

Thursday, 12 July 2012

Simla -bhopli mirchi peeth perun bhaaji |Dhabbu Dhobli Mirchi capsicum zhunka


Simla mirchi is the marathi name for capsicum /Green bell  peppers .Its my favourite & i used to carry it often in my lunch box.again my moms recipe .VERY SIMPLE ,QUICK ,TASTY BHAJI


Ingredients  

3 medium sized green bell peppers / capsicums (or take 2 bigger ones)
1/2 cup chick pea flour / gram flour (besan),
1 onion chopped
2 tsp chili powder,
1 tsp turmeric powder,
salt,
sugar (optional) to taste,
1/2 tsp asafoetida,
2 tsp mustard seeds,
3 tbsp oil,


Method

1. Wash the peppers. Wipe dry them with a kitchen towel. Chop into 1/2 inch square pieces.

2. In a kadhai roast the gram flour till golden brown(say 7-10 minutes)  keep aside.

3.Heat oil in a wok. Add mustard seeds, asafoetida and the chopped onion.saute till onion becomes pink.Next add turmeric powder. chili powder, 1/2 tsp turmeric ,sugar and salt.


3. Add peppers cook covered with lid till peppers are almost  done .when u mash with spoon they should be soft. 


4. Add gram flour and mix well until all the pieces are well coated with the flour. Fry for sometime over medium heat. cover with lid & cook for 5 minutes

5. Keep tossing the bhaaji until crisp and golden. Do not add water at any stage since this is a dry bhaaji.

6.Serve hot with chapati.


Tip:

1. Add 1 tsp of thalipeeth bhajani flour along with besan to above bhaji
2. Add 1 tsp coriander powder and 1/2 tsp cumin powder in the flour.
3. Try the same recipe with spring onions / methi.
4.This sabji needs more oil  so be generous .Add 2 tsp peanut powder in the flour.


Wednesday, 11 July 2012

AMBYACHA MORAMBA | KAIRICHA PHODINCHA MORAMBA| AAM ( MANGO) KA MURABBA |KAIRICHA KISACHA MORAMBA | PIKLELA AMBYACHA MORAMBA |INDIAN MANGO JAM|mango preserve


A simple recipe, so yummy, typical Maharashtrian delicacy.Moramba /MURABBA is an indian mango jam . 
Very simple to make and children love it too. You can eat it with chapati or bread or even as a sweet dish pots lunch .

The basic process for making moramba for both raw mango (kacha amba) & ripe mango ( piklela amba) is same .In case of raw mango kairi you can chop it into cubes (phodi) which is called phodincha moramba or can grate it which is known as kisacha moramba

ambycha kisacha moramba/grated mango moramba

Piklela ambyacha moramba / ripe mango moramba

AMBYACHA PHODINCHA MORAMBA /RAW MANGO PIECES MURABBA


Ingredients:

1  cup raw mango pieces (with skin removed) / ripe yellow mango
1  1/2 cup sugar (adjust sugar as per sourness of sugar)
1 tsp
pinch salt


Method :

1.Remove skin of raw green mango with help of peeler & make half inch pieces.remove skin properly or else moramba will turn black.

2.Mix mango pieces & sugar in a vessel & keep for 10 minutes.add pinch of salt

3. Next  keep the above vessel on gas on slow flame till sugar starts to melt & you get a two string sugar pak (don tari pak) .Keep on stirring in between .

4.After u get don tari pak switch off gas & add remaining elaichi powder & let it cool.

5. Once cool store it in a glass or plastic container .

6.Keep in fridge & it will stay for even one year.You can even  keep it even outside fridge for 1 month.


Tip:

1.While making raw mango moramba you can add 2 pieces of cloves (lavang) for extra taste.
2.Do not add lavang while making ripe / piklela ambyacha moramba.
3. Do not add water during the entire process of making murabba or else it can catch fungus after few months


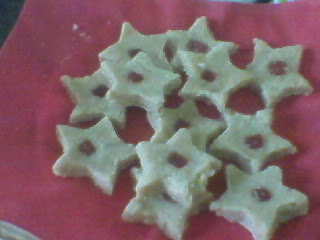
Batata naral wadi | Batatyachi Vadi recipe


As a teenager I never liked to get involved in making sweets  except tilgul laddos & karanjis. I found the process  tiresome.    However i enjoyed eating them  .One such recipe is potato barfi /batatyachi wadi /batata naral wadi    .Potato means batata in marathi & wadi /vadi means fudge/BARFI .Batata Burfi is an easy to make sweet and a quick recipe too.  You can have it as a dessert or as a sweet snack or just like that.

 It has a shelf life of about 10-15 days so you can make in advance and keep it ready to serve when needed. In hot summer days you can keep it for about a week.

Mom prepares a wide range of wadis like naralachi wadi  ,beetroot wadi,matarchi wadi/tomato vadi/AMBYACHI vadi   .


.Again moms recipe .So here we go    .

    .

Ingredients:


2 cup boiled potato smashed finely( ukadlela batatycha lagda)
1 cup fresh wet coconut grated /ola khobra
2 cup sugar(less or more as per your taste)
2 tablespoon clarified butter(ghee,toop)
1 teaspoon cardamom powder
Slices of almond & pista/tutti fruity for garnish

Method:

1.Smash boiled potatoes finely in a bowl. Mix grated coconut
Keep non-stick pan on medium heat,add half tsp ghee .Let it melt and add grated coconut,boiled mashed potato, sugar roast it for 5 mins. keep stirring continuously.Keep a close watch on it or the mixture will burn in two seconds.

2.After half an hour(or more) you will see  mixture & will get converted in form of a lump (gola).Add cardamom powder,keep stirring at least for another 2-3 minutes.It should not be total dry or thin,should be thick and sticky too.


3.Now turn off the heat and take one plastic sheet and apply some ghee on it .Place the mixture on it with spoon.Place another plastic sheet on it and spread down all the mixture evenly(1 inch thick) with the help of a rolling pin . second plastic is placed so that mixture doesnt stick to rolling pin while spreading it .


4. With help of knife make cuts on the mixture to form diamond shape/rhombus shaped wadis .You can even use different shaped moulds to cut the vadis Place sliced badam or pista or tuti fruity on each wadi.


5.Let it cool down for say 2-3 hrs.Take out all pieces & enjoy.

6.They stay fresh outside in an airtight container for 4-5 days  after that they must be refrigerated.

CLOSE LOOK

Don't forget to eat................... :)


Instant Oats dosa | Saffola oats breakfast indian recipe


Eat Breakfast like a King, Lunch like a Prince, and Dine like a Pauper This is an ancient proverb that we all are aware of .This fantastic nutritious packed Dosa made with  Oats and Rice is a perfect breakfast or end dinner for the day.The flavor of the Oats in the Dosa is a great plus .

We all are well aware that oats is a very healthy and nutritious food and as breakfast is the most vital meal of the day, the perfect way to start it would be with a bowl of oats. There is no doubt that oatmeal has been ranked as one of the best foods which can fight against cholesterol and a single bowl of oatmeal contains several vital nutrients such as complex carbohydrates, B vitamins, fiber, and minerals such as phosphorous, iron, selenium, and calcium.

The best benefits of oatmeal for weight loss is that it is a great source of fiber. The oatmeal is a soluble fiber, which means your body slowly moves this food product through your digestive system, allowing you to feel more satisfied for long amounts of time.

There is no doubt over the fact that a fiber rich diet leads to lowering of cholesterol and it also helps to control diabetes, obesity and cancer.

Knowing the health benefits of oats in our diet, I had bought saffola oats (masala flavour & pepper flavour) from ratnadeep super market . Since I have a liking for dosas at home or even in restaurants, I thought of utilizing  these oat packets for making oats dosa for last sat weekend .I served them with spicy peanut chutney andhra style .The batter fermented  well and the dosas were very light and crispy resulting in healthy dosas.


Add caption


Ingredients:

 Saffola  oats -  1 cup

Rice flour -1/2 cup

 Sooji or wheat flour  - 1/4 cup

 Green chilli  -2 chopped

 Coriander leaves chopped -1 tblsp

 Ginger chopped - 1 tsp

 Cumin seeds/jeera -1 tsp

 Pepper -1 tsp

Onion  -1 chopped

 Salt as needed

Water as needed


Method:
 1.Dry roast oats for 2 mins till  aroma comes and the color of oats slightly changes. Allow it to cool down then powder it finely.
2 In a serving bowl : Add oats powder, onions,rice flour, rava, jeera, onion, sooji ,pepper powder, salt and mix well. Make a thin batter of the all the ingredients by adding water thin batter like rava dosa batter,


2.Heat the dosa tawa,spread little oil , take one laddle of batter and drizzle it from the corners in a circular motion and finishing off in the middle like we do for rava dosas.
3.If there are holes in dosa u are proceeding in right direction. Drizzle oil,cover with lid & allow it cook till golden brown and turn over to other side, leave it for 30 seconds then transfer to the serving plate. 

4.Enjoy ur crispy oats dosa hot & enjoy with sambhar or any chutney.


5. I had served oats dosa  with milagai podi , lemon pickle & garlic chutney


Tips:

•You can omit onion and just make it plain oats dosa.
•Just spread a thin layer of the batter for getting crispy dosas.
•The consistency should be watery as we do for rawa dosa. Or you can make thick batter and make thick dosas as well.
.You can dry roast oats, powder it and store it in advance in air tight containers.

Monday, 9 July 2012

Orange peel powder for face packs and home made scrubs - Skin Whiteners


My mom used to prepare many face packs at home using natural ingredients easily available at home  for me as she always wanted her girl to look best!!Home made face packs & beauty tips are hygienic & natural becoz of the natural ingredients we need to prepare them & also economical compared to costly powders.This orange peel powder can be  used as a  face pack  to remove the tan,exfoliate your skin, prevention and treatment of acne, brighten your skin also balance the skin tone by giving a radiant look .


After applying  this face pack u can feel the difference in the texture of your skin & it rejuvenates u making u feel fresh & energetic.

Most of us, maybe all of us, throw away or compost the orange peels after enjoying the juicy and refreshing fruit inside. But if you knew the magic these pieces of orange skin have, you would never throw it away again. Let see some the uses of orange peels
Oranges are extremely rich in vitamin C, which acts as a good astringent and makes your skin glow, works well on pigmentation, dullness and makes skin smooth.  It evens your skin tone as well.

Note: You can use any citrus fruit peels like lemon ,lime in combination with orange for making this scrub at home. Usually I take 10 to 12 orange peels  for making this powder


Ingredients

10-12  Orange peel  about 1 cup


Method :
 
1.Preserve orange skin /peels after eating oranges &  dry them in sunlight. You can tie them in a porous vegetable bag & hang in your kitchen balcony.


2.Grind the dried orange peels in a mixie as powder.Sieve this through a strainer or galna so that u get fine powder. (If u want coarse powder do not strain the same .)


3.Conserve this orange peel powder,pack it in a plastic bag & store in an air tight box, use  as required.


close look


ORANGE PEEL FACE PACK

1.Make a face pack with a tablespoon of this orange peel powder ,rose water, milk /water & 1 tsp of lemon juice .
2.make a paste and apply over the face and neck...Once they get dry, wash the face pack with water.You can notice squeaky clean feel that leaves behind.
3.U will definitely see the glowing  facewhich is smooth ,free from oily skin after frequent use of this face pack.
4. When you want to ex-foliate your skin,apply the pack before bath all over your neck, arms, body and legs. Have a normal bath after pack is dry.
5.You can even mix  tablespoon of this orange peel powder with plain water & apply.
6.You can even mix  tablespoon of this orange peel powder with multani mitti &  plain water & apply.


Orange Peel Powder-  Natural Beauty Treatment –Top 10 Benefits
 
1.     Makes a relaxing soft facial mask or full body mask.
2.     Effective acne treatment.
3.     Natural source of vitamin E (anti-oxidant and anti-aging nutrient).
4.     Detoxifies skin.
5.     Remarkable wrinkle treatment.
6.     Regular use can delay early aging of skin.
7.     Brings a natural glow to the skin.
8.     Can lighten skin and remove tan lines.
9.     Perfect for at-home skin care or spa treatments.
10.  Excellent skin moisturizer.